I like to hunt. Getting outside and exploring, while providing hormone free food for my family, is one of the best feelings ever. After a good hunt I am able to pack the freezer full of meat that will be eaten over the course of the next year. Since a good portion of the deer meat that I bring home is turned into hamburger, I like to find different ways to cook and prepare it. The best way I have found is to turn the burger into delicious jerky. I have experimented with a few different ways over the years; here is the one that I have found to be the best.
Preparing the Meat
When you first start to prep your jerky meat, you have to make sure it is completely thawed out. While it is possible to use partially frozen burger, your fingers are going to go numb while you mix in the spices. So make sure to take the jerky from the freezer a few days in advance and put it in a large bowl in the refrigerator.
 Once the meat is thawed, dump it all into the bowl. I like to use a blender to get the bulk of the spices mixed in, a large countertop Kitchenaid works well. Now I used to use a premade spice blend, however I found that it is just as delicious, and much cheaper, to just mix your own spices. Find a recipe you think you will like online, and tweak it over the next few batches to make it your own. If you do use your own recipe, make sure to find some “pink salt” or curing salt. This mixture contains about 97% salt and 3% sodium nitrate. A quarter teaspoon per 5 pounds of meat will cure the entire batch, and it can be purchased for just a few dollars per pound at most butcher shops.
Shaping the Jerky
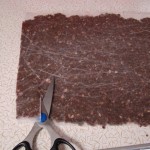
Once you have your meat spiced and blended well there are two ways to get it into strips. Originally I started out by placing a large gob of meat between two pieces of waxed paper, and then using a rolling pin I would flatten it until about 1/8 inch thick. I would slowly peel off the waxed paper and try to cut the meat to fit my drying rack. This turned out to be a nightmare. Then I realized I could use a scissors and cut the meat to size before removing the waxed paper. I liked this method, but it was still a little cumbersome for me.
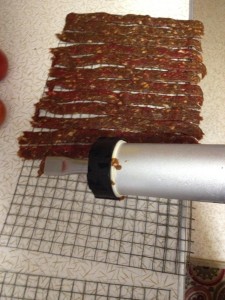
 I went to Cabela’s and checked their jerky making department (yes, there is basically an entire shelf dedicated to the process). They make 2 sizes of jerky guns, and they both happened to be 50% off. I chose the smaller for ease of storage reasons. The gun proved to be even easier to use, the only drawback is that you can only make one shape to your jerky. If you want bigger pieces, you have to shape them by hand.
Cooking the Jerky
There are two different ways to cook your jerky, and it all depends on which device you want to tie up, and how much time you have.
 When I first started, I was using a dehydrator. I would put the jerky into the machine, turn it on and wait. Then wait some more. And keep waiting. In fact, I found that to make one batch of jerky, I would have to run the dehydrator for about 7 hours. Since I was making 5 pounds at a time, I would fill up all the racks, and then have to unload and start again. So a full 5 pounds would take me 14 hours to make my jerky. While it was easy to just set the dehydrator and leave it, I didn’t want to wait that long. So I found a new method (keep in mind that not all dehydrators are the same, some of the newer fancier models may work faster and more efficiently).
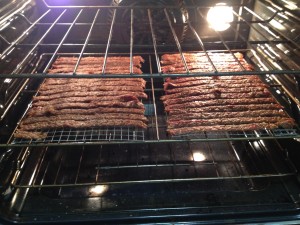
 I found some quarter inch screen and shaped it so that my pieces of jerky would be the same size as a one gallon freezer bag. Onto these racks I squeezed the jerky through the gun until they were completely full. I set my oven to convection bake (to help circulate the air, this is not entirely necessary) at the lowest temperature possible; my oven goes down to 170 degrees. Rolling up a piece of aluminum foil I would prop the door to the oven open just slightly to let the steam escape (putting the foil on the pressure switch made the oven “think” the door was closed). I found this method would fully cook the jerky in 2 to 4 hours depending on how dry I wanted it. 2 hours if I was to eat it frozen at home; 4 hours if I wanted to carry it with me backpacking.
Storing the Jerky
Even with the pink curing salt, your jerky will spoil in the refrigerator (there are ways to preserve it, but I find the fewer chemicals the better). So instead of taking the chance that you will lose a batch of meat in the fridge, put it in gallon sized freezer bags, and store it in the freezer. The jerky is thin enough that you can eat it while frozen, or you can take it out 10 minutes ahead of time to let it thaw just enough. You will want to make sure it is stored in airtight packaging, or you will risk freezer burns.
After you have a full batch, enjoy a high protein snack a couple times per day. This jerky will last a long time in the freezer, and help round out your diet.
Have you ever made jerky? What is your preferred method?


